|
| ||||||||||||||||||||||||||||||||||||||||||||||||||||||||||||||||||||||||||||||||||||||||||||||||||
|
(Altitudes) I don't think I could design, in any significant way, a sort of traxx school that deals with altitudes. There is no easy way to teach altitude work. Having said that, this page will NOT be a review or repetition of the side bar buttons. Instead, I will try to address issues surrounding the many problems faced by new track makers and, hopefully, provide strategies to avoid these errors before they occur. I will present the material on a problem by problem basis so that I can add to the page as new ideas are brought to my attention. 1. Transitions to and from hills In real life, roads do not have a sudden rise at the bottom and top of hills. For a good driving track, MTM2 should have smooth transitions on hills too. For example, in the following two graphs the red line line represents a cross-section view of the terrain. Assuming that the road follows the red line, ask yourself which road you would rather drive on (going up and/or going down).
Yes, there may be places where a "sudden impact" type rise or fall will
be exactly what's called for, but generally the reason we see this kind
of altitude work is from a misunderstanding of the ramp
To get a smooth transition to a hill, increase the altitude by 1 foot on the first step. On the next step, increase by 2 (that is, add 2 to the first step). On the next step increase by 3 (using the S and X keys will help make these adjustments easier). On the next, by 4. Continue with this gradual increase until you reach the steepness you want, then increase by a steady amount. Continue with that value until you get near the top of the hill. Then, begin decreasing the value by 1 on each step until you are flat once again. Remember you are still adding to the terrain altitude but by smaller amounts. The following table shows what I have been trying to describe.
Above is a gradual transition to a medium steep hill. You may also use a more dramatic approach for a steeper hill. For example the following table of values will have a more sudden increase and a much steeper hill.
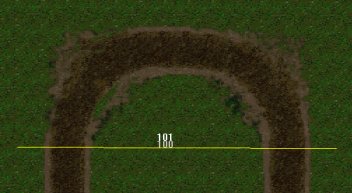
You can play around until you get the hill the way you want. Experiment with transitions that are more gradual or more sudden, and try different rates of increase (steepness) on the main part of the rise. 2. Banked U-Turns Use exactly the same method described in question 1, but extend the altitude line so that it stretches all the way across the entire turn. For example, like this:
Increase the altitude for each step as you move toward the outer part of the corner. 3. Copy & Paste Terrain Area Sometimes you will find that you've made a corner (or something) with which you are very satisfied. You can re-use your work in another part of your track by copying and pasting it. To do this, in terrain edit mode, set the working area to the size that you want to reproduce using the width and height values on the side bar (the altitude value doesn't count here). For example.
Next, place the cursor's yellow grid marker over the area you want to copy and right click. From the popup menu, select copy area.
Now move to the spot where you want the curve to appear. Right click and select paste area. Yes, you may also use Ctrl+V.
That's it! Your curve has been successfully copied from one place to another.
4. Raise & Lower Terrain Sometimes you will find that you want your hills to go higher or your valleys to go lower than you have room for. Provided you have not used the full 0 to 256 altitude range, you can gain extra room by raising or lowering the entire terrain. To do this, in terrain edit mode, right click the terrain and select Raise/Lower:
This will bring up the Raise/Lower Terrain box.
The current minimum and maximum values show you the lowest and highest points in your track. This will help you know just how much you can raise and lower the terrain. Set the "Altitude Increment" to the amount (positive=up; negative=down) you want to change your track. It is a good idea to leave the "avoid clipping" box checked so that you don't get flattened mountain tops or valley basins in your track. Click OK and the entire grid area will rise or sink by the amount you have indicated.
5. Jagged Landscape I don't know exactly how people do this, but I've noticed that many many new track makers have scenery with jagged and unformed scenery. This is totally unnecessary and very easy to avoid.
When you want to create landscape around your track, try using the hill
button 6. Rough Corners (with some notes by Malibu350) First you lay the track suface down. Then using the edit terrain/slope tool set the height and curvature you want to the sections of the track where you want the bank (start with a low bank and gradually get steeper, then taper down again to flatness for the straights). At first, it will be very rough. This is where it takes alot of time and a good eyeball to smooth it out.
Getting those banked turns just perfect is extremely difficult.
There is only one cure: be patient and spend a lot of time fine-tuning
with the manual "hand" tool Tip: set the zoom "Z" button low and "page up" so you are on the track surface and just follow the track surface weeding out the bumps. |