|
| ||||
|
(Course Editor) We need to specify the "main" course (used in the game for the map), and also a couple courses for the computer trucks to follow. To work with courses we need the Course Editor. From the track editor menu, select "E. Course Editor" by pressing the E key. You may also use the arrow keys to highlight "E. Course Editor" and press enter. 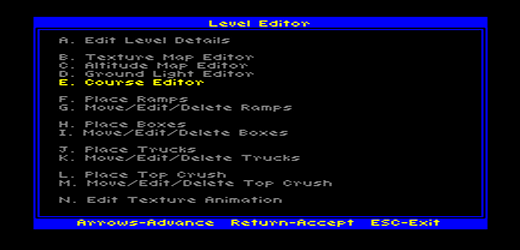 You will see your track in the editor window. Well, not exactly "your" track. Remember, we cloned crazy 98. So, what you see is the course for crazy 98. 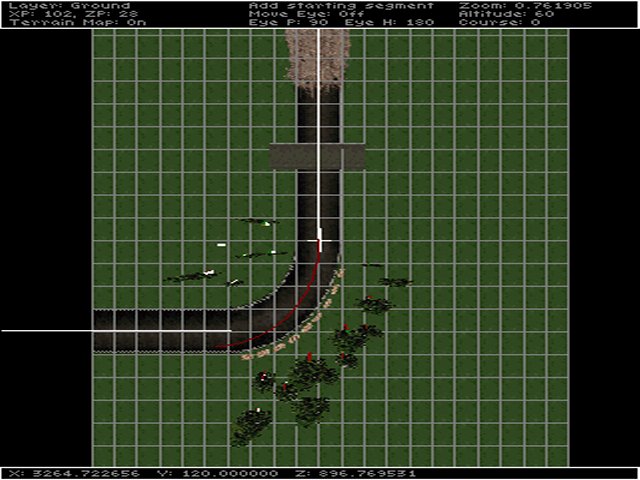 Delete old course. We need to delete all t he course segments from crazy 98 before we can set them up in our own track. To do this, we must move to the beginning of the first course. Note in the center of the information bar where it says "Add starting segment" Use the square bracket [,] keys to move to the beginning of the first segment. It will say "Edit seg start: 0"  Now just press the X key. Keep pressing it until there's no courses left or pressing it has no effect. When done, you may still see a short white line but that should be okay. Press the ~ (tilde) key to change to course 1. You can see which course is active in the lower right corner of the information bar.  Again, press the X key to delete all course segments. Repeat for course 2. (courses three and four should have no segments set - if they do, delete those too). Once all old segments are deleted, press J to jump to 128,128 in the terrain (where you track is located).  Insert new course. The information bar should say "Add Starting Segment." Position the cursor at the beginning of the first straight road section. (hold the Alt key and use the arrow keys at the same time for more precise movement). Press the space bar to anchor down the segment start point. The information bar should change to "Add Ending Segment." Use the arrow keys to move the cursor to the end of the straight road. Press the space bar again to anchor the end point. Note. Press the D key to turn off the grid if you prefer to work that way. 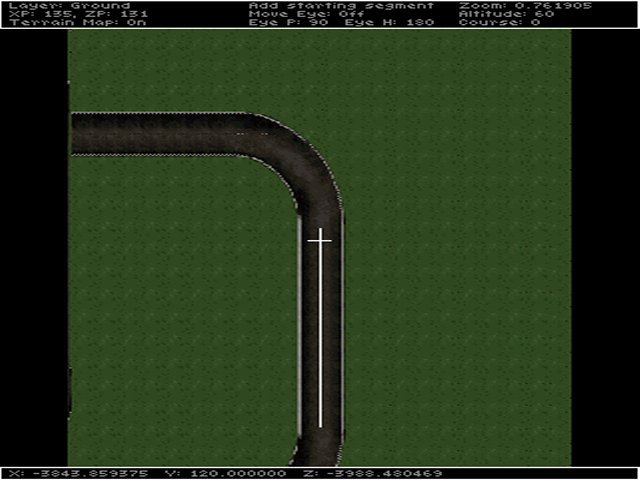 Now move the cursor to the beginning of the next straight and press the space bar to anchor the start point for the next course segment. Again, move to the end of the road and press space to anchor the end point. Continue in this way for the rest of the oval. As you work, you may see red lines that try to join the ends of the segments. That's normal. We only have to add the straight segments; tracked2 calculates the corners for us. They may not look correct until you finish all the segments for the course. That's normal too. When you're done, it should look something like this. 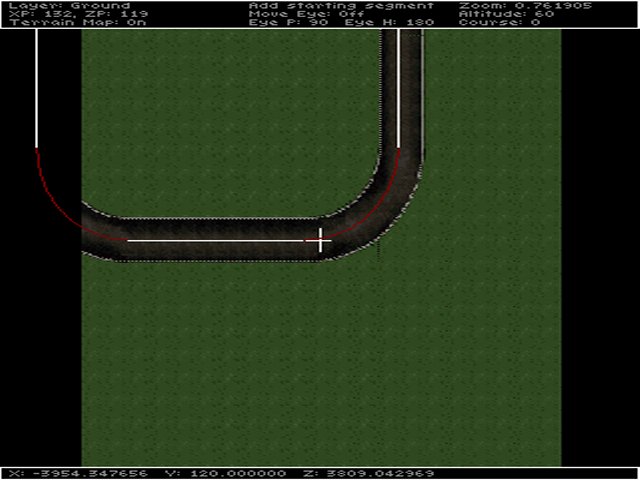 Repeat this process for courses 1 and 2. Use the ~ (tilde) key to cycle through the courses. Note. Always complete a course in order from beginning of track to end, and always complete one course before going on to the next. When you exit (Esc key) the courses will automatically be saved. Tips. The closer that you move these points towards each other, the tighter and slower the computer trucks will take a turn. Speed is also affected by the ground typing that you do for your textures (i.e. dirt textures and grass textures), so you will need to revisit your course to make adjustments later on. Never put two segments together to form a straight line. You only need one straight segment for a course to work properly. DON'T DO THIS: o---------o o---------o The whole idea for the course editor is to make it easy for the track designers. Place straight course segments down and let the game compute the curves for trucks to follow. Later, if you want to change the position of a course segment, use the square bracket [,] keys to cycle through to the point you want, then just use the arrow keys to move it around. Position the trucks. From the track editor menu, select "K. Move/Edit/Delete Trucks" by pressing the K key. You may also use the arrow keys to highlight "K. Move/Edit/Delete Trucks" and press enter. 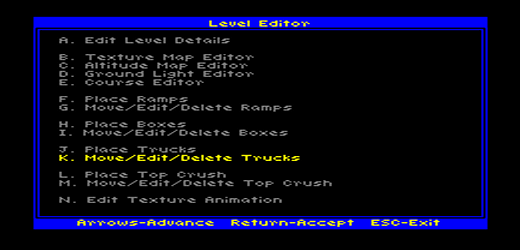 You will see the trucks lined up on crazy 98. Remember, you do not have to insert trucks because you cloned the track. There are eight default trucks already in the track - but not in the spot we want - you just need to move these over to the starting line. Use the bracket [,] keys to select a truck.  Press J and type "128,128" to jump up to your track. If you prefer just to scroll to your track, holding the arrow keys and shift at the same time will speed up travelling. 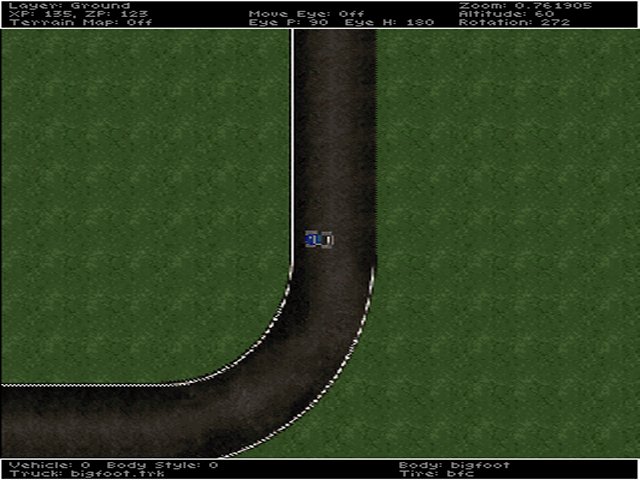 Important. Do not accidentally press the X key. This will delete the selected truck and you will have no small problem to place a new one back in. When you get into position, use the PgUp and End keys to rotate the truck so it faces in the direction you want. Hold Alt at the same time for more precise placement. Now repeat for the other seven trucks. Move them over and place each one in their own grid square so that they do not bump into each other when we start a race. When you're done, you should look something like this. 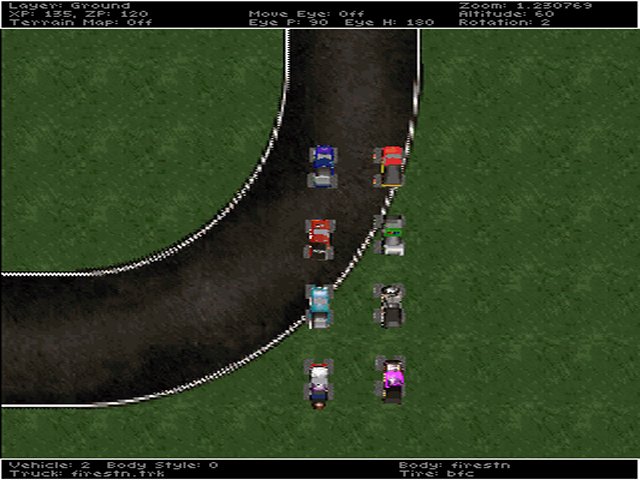 Save your work.
|